Description
These Mickey Ice Cream Sandwiches are my dairy-free and egg-free version of the iconic Disneyworld treat: two Mickey-shaped chocolate wafer cookies filled with cookies & cream ice cream.
Ingredients
- 1 1/2 cups cake flour (I use Swan’s Down)
- 3/4 cup cocoa powder
- 1 1/4 cup powdered sugar
- 1/4 teaspoon baking soda
- 1/4 teaspoon salt
- 14 T. dairy-free margarine or shortening
Instructions
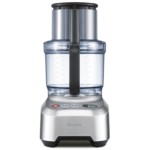
- Place everything except the margarine into a food processor and pulse a few times to mix.
- Slice the margarine into the food processor bowl.
- Pulse about 8-10 times until the margarine is well blended and comes together into a ball.
- Wrap the dough in plastic wrap and refrigerate for at least an hour.
- Roll out to ¼ inch thickness and cut into shapes.
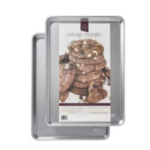
- Place the cookies on a parchment-lined baking sheet and place in the freezer.
- Preheat the oven to 350 while the cookies freeze.
- Bake for 10-12 minutes. They should puff up, then flatten out. When they start smelling good, they’re probably ready.
- Let them rest on the baking sheet for a few minutes before moving to a cooling rack, they’re pretty fragile when hot.
- When cool, you can fill them with ice cream and freeze. Because the cookies are crisp, make sure the whole sandwich is well-frozen before eating…otherwise the ice cream slides out when you take a bite! (Not that I was impatient, and had this happen to me…)
Notes
These are kinda fussy as far as measuring goes, I think because the dry ingredients can get really packed down during storage. For the flour, cocoa and powdered sugar, fluff them up with spoon, then scoop with the measuring cup and level off with a knife. I found my vintage Mickey cookie cutter on Ebay, but you can find simple Mickey Ears cookie cutters on Amazon.
- Category: Dessert
- Method: Baked
- Cuisine: American
Keywords: homemade ice cream sandwiches, Mickey Ice Cream Sandwiches, Disney desserts


