


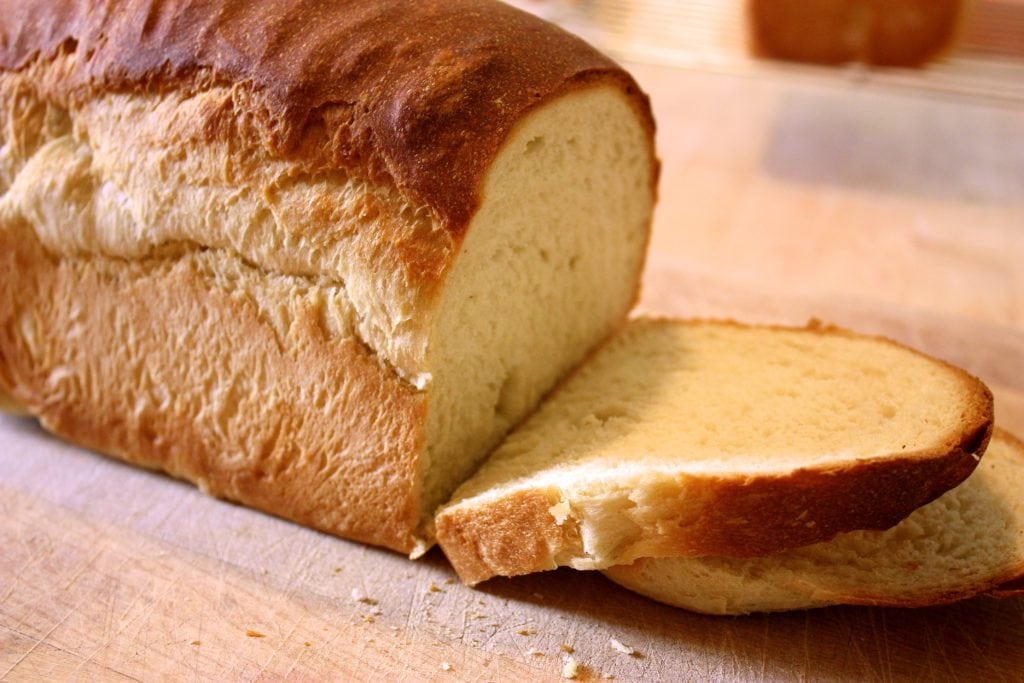
I work a funky evening shift on Tuesdays, so I spend the morning with the kids and head to work by noon. I’ve learned that the morning can slip by very easily and it’s hard to feel like anything has been accomplished by noon. So now Tuesday is bread day, and I can get two loaves done before heading out the door and feel pretty good about myself!
I’ve got this down to a science now, it’s pretty foolproof, so set a timer and amaze yourself.
The cold oven start seems a bit odd, but it works and saves time! Enjoy!
Print
Cold Oven White Bread
- Yield: 2 large loaves 1x
Ingredients
- 6 cups bread flour ( I use King Arthur Bread Flour)
- 2 teaspoons yeast (or one package)
- 2 teaspoons salt
- 1/3 cup white sugar
- 2/3 cup potato flakes
- 3 cups warm water
- 2 T. oil
Instructions
- Mix everything in a stand mixer and knead until soft and smooth (about 5-8 minutes). The dough should be slightly tacky and hold its shape, but not a gloppy mess. If it’s too wet, add more flour until it feels right.
- Cover mixing bowl with a towel and let raise at room temp until doubled, about 1 1/2 hours.
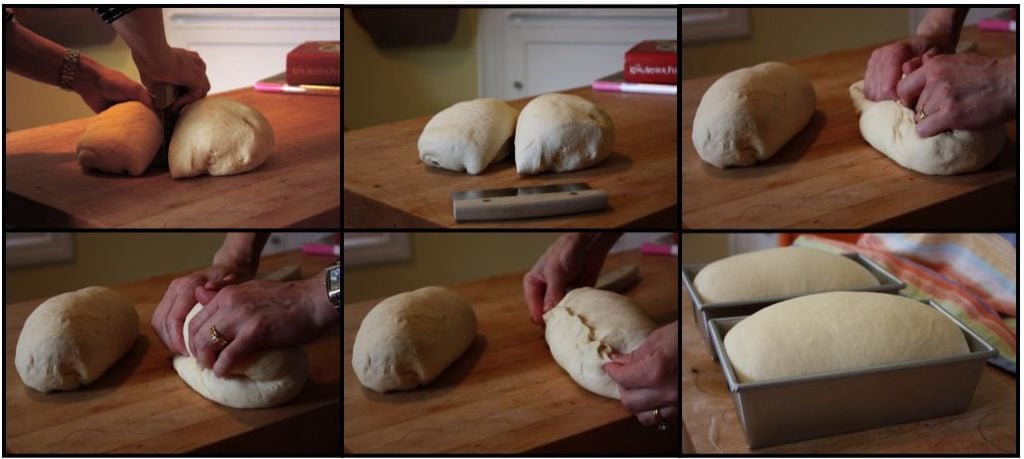
- Scoop the dough out onto a table, divide into two and shape into 2 nice tight loaves.
- Place in oiled loaf pans and cover with a towel, let raise until the ends of the bread have risen to the lip of the bread pan (about 1 hour).
- Place in a cold oven.Set the oven to 365 and bake for 30-40 minutes.
- Tent loosely with foil if they are browning too quickly. Test for doneness with a thermometer, it should read 185-200 degrees.
- Cool on a rack a bit before cutting.
Notes
This recipe intentionally has a touch too much water, I’ve found it’s easier to add flour to overly wet dough than it is to add water to an overly dry dough. Anticipate adding another 1/4-1/2 cup of flour to get a soft but not sloppy dough.
Typical Schedule
8:00 Put stuff in mixer, knead, drink coffee, feed kids
8:30-10:00 Covered in bowl for First Rise
10-10:15 Shape into loaves
10:15-11:15 Covered in pans for Second
Rise 11:15-Noon Cold Oven Start Baking
Noon: Mission Accomplished, head out the door with my stethoscope, coffee and a slice of hot bread!

Those look awesome! I have the hardest time getting homemade bread that isn't too dense. When I get back to bread baking in a few weeks, I'm definitely going try this recipe out. The bonus with the cold oven for me is that I can bake the bread in the summer, too and not heat up our home too badly!
Really this stuff is pretty foolproof, I think the potato flakes make it pretty forgiving.
Those loafs really look beautiful. I love making my own bread as well. It is my routine, and I am absolutely agree with you, that homemade bread are by far more superior then you know what?
Beautiful loaves! I always slice bread with an electric knife. It's a trick I learned from my grandmother.
Hi! I made Real Lovin' Bread today!! I have a question about how you store it for the week. Do you pre-slice it or wait until the day you use it? Also, do you wrap it and store it in the fridge? Thanks! As you can tell, I'm a bread-making novice. 🙂
Hi Elisha! Congratulations on the bread! I usually store the bread whole, and slice it as I go, that way it doesn't dry out. Around here, they have "food storage bags" which are gallon sized plastic bags that come with twisty ties, and are perfect for bread. Gallon-sized ziplocks don't work because they can't close around a whole loaf. Paper bags don't work because the bread dries out. I usually store it at room temp and try to eat it within 5 days, any that is left longer gets ground up and frozen to be used later as breadcrumbs…and then 2 days later it's time to make more fresh bread!
Popping in again to say that Monday has become our Real Lovin' Bread day. My boys are homeschooled on Monday, so we get up, make bread, and have a slice by mid-morning snack break. This morning, my middle child, our most allergy-afflicted one answered my question of "Do you know what day it is?" with a loud "BREAD DAY!" Thanks again for posting your recipes. 🙂
I tried this recipe today and my house smells awesome. I am not sure that I used the right type of potato flakes though, my bread seems very dense. I shop at a Meijer and they had lots of kinds of instant potatoes with lots of "junk" in them. I used a natural brand, but was wondering what you use. Thanks!
Hi ChloBug's Mom, I edited the recipe to make the "optional" 1/4 cup of water a mandatory one, another lady in my office made the same comment about the firmness of the dough. Also, my flour measuring technique is to 'fluff up' the flour in the bag with my measuring spoon, then scoop and level with a knife, so I may be using less flour that other people with that technique. I use Betty Crocker Potato Buds, yeah, there are some chemically things in there, but there are also some chemically things in my wall paint and carpet and I find my kids licking stuff on walls and floors all the time. I can't stress too much!
Thanks for the response. I will try your method. I still like the bread as it turned out, but was jsut wondering. I agree, you cant stress too much. And thanks to you I joined "The Daring Bakers"! And I love it. Also, I got to see you speak at a MOPS group last year, you were great and very funny and your recipes look so good.
HI- I have a silly question. I'd love to try this recipe (I have two beautiful girls with almost the exact same allergies). However, when I went on the King Arthur website to get flour and pans, there are 2 sizes of bread pans- what size pan do you use? 9 x 5 or 8.5 x 4.5? (I know, I know, but I like to be exact!) BTW, tried the meatballs last week-YUM!
Ha! Someone as particular as I am! I have the Chicago Metallic Commercial Uncoated 1 pound loaf which is 8.5 x 4.5. I got it from King Arthur 5 years ago, but is now on Amazon. It looks like King Arthur now has their own design, which looks awesome. The other pan I love is the biscotti pan, which I use to make biscotti of course…but I use this exact bread dough recipe to make hot dog buns in the biscotti pan. It's $12 cheaper than their New England Hot Dog Bun pan, and serves double purpose.
Stopping by to say I’ve been making and loving this bread recipe for over nine years! Love it so much and always make an extra loaf to welcome a new neighbor. My oldest is just off to college and he will definitely miss “bread day.”
I walked into the kitchen the other day and there was a big container about 2 feet long and 2 feet high filled with sour dough starter. Respect.
★★★★★